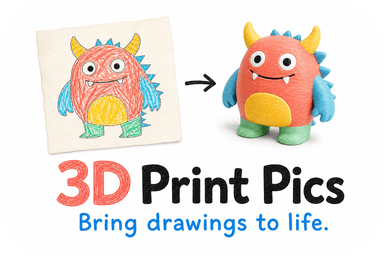
A 3D print preview is a look at your object before the printer starts. It can mean two different things. For hobbyists it is the layer-by-layer simulation in slicing software. For anyone ordering a custom keepsake from a photo or drawing, it is a 3D model you review and approve before it is printed. This guide covers both, what to look for in each, and how to approve a preview with confidence.
TL;DR
- A technical preview (the slicer view) checks whether a file can be printed. An approval preview checks whether the model looks like what you wanted. You need the second one when you order a custom piece.
- In slicing software, scrub through the layers instead of trusting the solid view. Most errors only show up layer by layer.
- Approve a custom model only after checking the silhouette, the details, the colors and the size against your source image.
- Anything meant for a child needs a separate safety check: small parts, sharp edges and material choice matter more than looks.
- At 3D Print Pics, you upload an image, review a generated 3D model and approve it before printing starts.
Table of Contents
- Two kinds of 3D print preview
- What a slicer preview actually shows
- The approval preview for custom keepsakes
- Our perspective: a preview should be a decision, not a formality
- Safety checks a preview cannot do for you
- Compare options by preview, not by price alone
- Order a custom 3D print with a preview first
- FAQ
- Sources
Two kinds of 3D print preview
Search for this phrase and you mostly find free viewers that open an STL file in your browser. Those are useful if you already have a model file. They let you rotate, zoom and inspect the mesh. But a viewer only shows geometry. It does not tell you how the print will be built, and it does not tell you whether the model is the one you had in mind.
It helps to separate the two jobs a preview can do:
| Technical preview | Approval preview | |
|---|---|---|
| Who uses it | Makers running their own printer | Customers ordering a custom print |
| Input | STL or 3MF model file | Photo, drawing, logo or character art |
| Question it answers | Will this print cleanly? | Is this the object I want? |
| What you check | Layers, supports, print time, material use | Shape, details, color, size |
| Who acts on it | You, by changing settings | You, by approving or asking for changes |
Most of this article is about the second job, because that is where people ordering a gift or a keepsake get stuck. The first job still deserves a proper section, since it explains why a good preview matters so much.
What a slicer preview actually shows
A slicer converts a 3D model into printer-ready instructions called G-code. The preview that comes with it simulates layer height, support structures and toolpaths, and it helps you estimate print time and material use before printing begins. Vextrude's description of its free browser slicer lays out that workflow, and it also notes that a 0.2 mm layer height is the usual balance of speed and quality, while 0.1 mm gives smoother surfaces.

That tells you something practical. Finer layers mean a smoother object and a longer print. When you see a ridged, stepped surface on a curved figure, layer height is the first setting to question.
Scrub the layers, do not trust the solid view
The most common beginner mistake is looking only at the solid, finished-looking view. The UNSW Making guide to 3D printing basics points out that you need to move through the sliced preview layer by layer, because problems such as non-manifold geometry, inverted faces or missing supports often only show at the layer level.
A quick routine:
- Switch from the solid view to the layer view.
- Drag the slider from the first layer to the last, slowly.
- Watch the first layer. If it is a thin sliver of contact, the print may not stick.
- Look for overhangs with nothing under them. Those need supports or a different orientation.
- Check thin walls and tiny features. If they vanish in the layer view, they will vanish in the print.
- Read the time and material estimate. A number far from what you expected usually means a wrong scale.
One Cura tutorial describes the layer view as the way to see what the inside of your print will look like and how it will be printed. That inside view is where you catch infill and wall problems.
Profiles matter more than software
Practitioners quoted by 3D Printer World say the print profile (nozzle size, speed, temperature) often matters more than which slicer you use. Their advice when switching tools is to reproduce a job you already know, and to print calibration parts first. A preview is only as honest as the profile behind it.
What a slicer preview cannot show
A slicer tells you about structure. It does not tell you how the finished object will look. MIT CSAIL researchers describe a persistent gap between digital previews and physical results, because standard tools struggle to show layer line visibility, gloss and translucency. They built a preview tool that combines slicer data with photos of real material samples to close part of that gap.

The lesson for non-experts: a preview on a screen is a guide, not a guarantee of surface finish. Layer lines, a matte look and the exact feel of the plastic only show up in your hands. A good preview process is honest about that.
The approval preview for custom keepsakes
If you are turning a child's drawing, a pet photo or a logo into a physical object, you probably do not own a model file at all. You have an image. The preview you need is a generated 3D model that you can look at and say yes or no to before it is made.
This is how that step works on our site:
- Choose a size and whether you want a single color or multiple colors.
- Pay securely and upload your image.
- We generate a 3D model automatically with AI and show you a preview.
- You review it and approve it.
- Only after approval does the model go to print. It is made in non-toxic PLA and shipped to your door.
The order matters. Approval is a gate, not a courtesy email. Nothing moves to print until you say so. If you want the full walkthrough of how a photo becomes a model, see our guide Preview in Three Clicks: Turn a Photo Into the Right 3D Model Keepsake.
What to check on an approval preview
A model preview is quick to glance at and easy to approve too fast. Slow down for these five checks.
1. The silhouette. From the front, does the outline match your image? A crayon cat should look like that cat, not a generic one. Rotate the model and check the sides and back too. The back is where a generated model is most likely to be guessing.
2. The details you care about. Name them before you look. For a pet, it might be ear shape, a white paw or a collar tag. For a child's drawing, it might be the wobbly arm or the sun in the corner. If the detail is missing in the preview, it will be missing in the print.
3. Thin and fragile parts. Antennae, tails, thin lines and stick-figure limbs are the parts most likely to break or to be thickened by the model. Ask whether you are happy with how they were interpreted.
4. Color. We offer up to seven color choices in PLA. Compare the preview colors with your source image, but keep in mind that a screen is not a spool of plastic. If an exact brand color matters, say so before you order. For more on single color versus multicolor, read Multicolor 3D Printing: Which Setup Fits Photos, Parts, or Keepsakes?
5. Size. Look at the size you chose and picture it on a desk or shelf. A model that looks bold on a monitor can be small in the hand. If it will hold fine detail, a larger size gives those details room.
Start with a source image that previews well
The preview can only work with what you give it. Our own guidance is that the best results come from one main subject on a simple background. Practical steps:
- Photograph the drawing flat, in even light, with no shadows across the page.
- Crop tight so the subject fills the frame.
- For a pet, choose a clear side or three-quarter view over a busy snapshot.
- For a logo, use the cleanest, highest-resolution version you have. Our guide on turning a logo into a 3D model covers the options.
- For line art, see Skip CAD: Choose SVG or AI to Turn Line Art Into Print Ready 3D.
If you plan to paint the finished piece, prepare the photo with that in mind. We cover it in One Photo Paintable 3D Prints: Photo Prep, Preview, PLA Safety.
Our perspective: a preview should be a decision, not a formality
We built our process around one idea. People ordering a keepsake are not engineers, and they should not have to read toolpaths to feel safe about an order. They need to see the object, understand it and decide.
That is why we put the preview before printing, not after. A custom object made from a child's drawing or a lost pet's photo is hard to replace emotionally, and a print that comes out wrong costs hours of machine time. Catching a problem on screen is cheaper for everyone than catching it on a shelf.
We also think previews should be honest about their limits. A screen shows shape and color well. It cannot show you how plastic catches the light. We would rather you know that now than be surprised later.
Our advice to every customer is the same: look at the back and the sides, check the detail you care about most, and approve only when you would be happy to hold that exact shape. If something looks off, do not approve it.
— Ian
Safety checks a preview cannot do for you
A preview shows appearance. It does not show whether the object is safe for a toddler. The U.S. Consumer Product Safety Commission's report on 3D printing and printed consumer products says printing parameters should be optimized to meet mechanical performance standards such as ASTM F963-17, and it warns about hazards like sharp edges and small parts that may not meet safety guidelines for children's use.
In practice, that means looking at your preview with a second question: could any piece break off, and is it small enough to be swallowed? Thin tails, ears and antennae are the usual suspects. If the piece is for a young child, treat it as a display item for a shelf unless you have confirmed it is appropriate for their age.
Material and the way it is printed matter too. A CDC-hosted study on 3D printer emissions indicates that filament type, color and extruder conditions such as temperature and nozzle diameter affect emission profiles. That is mostly a concern for people running printers in classrooms and homes, and it is the reason we cover when non-toxic PLA is and is not safe at home or school in a separate guide. If the piece might ever touch food or drink, read why 3D prints are not food safe first.
Compare options by preview, not by price alone
When you shop for a custom 3D print, the services differ less in the printer than in the process around it. Ask these questions of any provider, including us:
- Do I see a model before it prints? If the answer is a flat mockup image only, you are approving a picture, not a shape.
- Can I rotate it? A single front view hides the back.
- What happens if I do not like it? Look for a clear answer before you pay.
- Are colors and sizes shown in the preview? You want to approve the final choice, not a default.
- What is the material? Check the plastic is named, and read what the seller says about safety.
- How long until it ships? Our own timing is covered in 3D Printing Turnaround Time: 3 Hours to Print, 2–3 Days to Deliver.
A provider who answers all six clearly is usually one you can trust with a one-of-a-kind image. Cost matters as well, and our breakdown of what small buyers pay for custom 3D prints puts the range in context.
Approval for teams, schools and businesses
Preview and approval is also how organizations avoid expensive mistakes. A PTA ordering a class mascot, an art teacher turning student drawings into a display, or a business ordering a promotional mascot all need one person to say yes. Name that person before the order, and share the preview with whoever else has a stake: a principal, a brand manager, a parent group. Approving once, with everyone's input, is faster than reprinting.
If you want to see how formal this gets in a shop with its own printers, some printer ecosystems include a job approval feature that lets designated users approve or reject jobs submitted by others, as Ultimaker's support page on print job approvals explains. The idea is the same one: a named person signs off before material is used.
Order a custom 3D print with a preview first
We turn images, children's drawings, pet photos and logos into 3D printed models. You pick the size and colors, upload your image, review the generated model and approve it before anything prints. Custom 3D models cost $49.99 to $77.99, depending on your choices. If you are on a deadline, rush processing is available for $10. You can start at 3dprintpics.com.
FAQ
What is a 3D print preview?
It is a view of a 3D object before it is printed. In slicing software it simulates the layers, supports and toolpaths so you can spot errors. In a custom-order service it is a 3D model of your design that you review and approve before production.
How does 3D print approval work when I order from a photo?
You choose size and color, upload your image and wait for the generated model. You then review it and approve it. On our site, printing starts only after you approve.
What should I look for before I approve a preview?
Check the outline from every side, the details that matter most to you, any thin parts that could snap, the colors and the size. For anything a young child might handle, also check for small or sharp pieces. Approve only when you are comfortable with all of it.
Will the printed object look exactly like the preview?
Shape and color should match closely, but a screen cannot fully show surface finish. Research from MIT CSAIL notes that layer lines, gloss and translucency are hard to preview. Expect fine layer texture on any printed object.
Can I use a free STL viewer instead?
Yes, if you already have a model file and just want to inspect it. A viewer will not turn a photo into a model, and it will not slice the file or estimate the print. For a custom piece from an image, an approval preview is the step you need.
Sources
- Vextrude: Free online 3D print slicer
- UNSW Making: 3D printing basics
- Ultimaker Cura tutorial (MCAD)
- 3D Printer World: best 3D printing software
- MIT CSAIL: preview tool helps makers visualize 3D-printed objects
- CPSC: safety concerns associated with 3D printing and 3D printed consumer products
- CDC Stacks: 3D printer emissions study
- Ultimaker Support: manage print job approvals