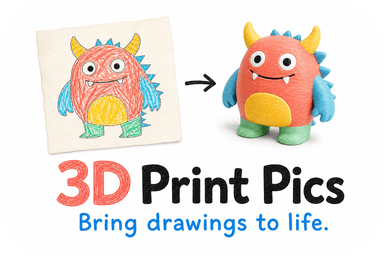
You can turn a child's drawing into a ready-to-print 3D keepsake in a matter of days using an image-to-model service that lets you preview the design before anything gets printed. We built our process around exactly that: AI conversion, a model preview, color choices, and non-toxic PLA, so you approve the look before we print it.
TL;DR:
- Bas relief preserves the drawing as a mostly flat plaque, while a figurine has depth and requires more interpretation of the original lines.
- Prices range from $49.99 to $77.99, with size driving most variation; multicolor finishes, smoother surfaces, and $10 rush processing can add cost.
- A JPEG or PNG in good light against a plain background works best; scan wrinkled paper and simplify busy sketches because fine marks may disappear.
- PLA can soften at around 60°C and fade under sunlight, and the keepsake is not food safe because standard prints lack specialized coatings or hardware.
- Standard production takes a few days after preview approval, with shipping added; repairs to thin limbs or mesh gaps can cause a short delay.
Table of Contents
- What the Finished Keepsake Looks Like
- How the Drawing-to-Model Process Works
- How to Prepare a Drawing for the Best Result
- Materials, Safety, and How Long the Keepsake Lasts
- Pricing, Sizing, and How Long It Takes
- Caring for and Displaying the Finished Piece
- Why These Keepsakes Matter to Us
- Start Your Keepsake With 3D Print Pics
- FAQ
- Sources
What the Finished Keepsake Looks Like
A drawing can become a 3D piece in two main forms. A bas-relief keeps the artwork mostly flat with raised outlines and shading, closer to a textured plaque than a figure you can turn around. A full figurine interprets the drawing in three dimensions, giving it a front, back, and sides, which usually means more interpretation of the original lines.
Most orders are small enough for a shelf or desk, and there are several PLA color choices so the print can match crayon or marker colors fairly closely.
Common uses include:
- A keepsake that preserves a specific drawing permanently
- A holiday ornament made from a seasonal drawing
- A desk or shelf figure for a parent's office
- A small durable toy for imaginative play
How the Drawing-to-Model Process Works
The path from a flat sketch to a physical object follows a consistent sequence, and knowing it helps you avoid back-and-forth revisions.
- Upload the image. A clear photo or flatbed scan works, saved as a JPEG or PNG.
- AI conversion generates a draft mesh. Our system interprets the lines, shapes, and colors in the drawing and builds a 3D mesh from them.
- Review for errors. AI-generated models can look convincing at a glance but still need a printability check, since thin or disconnected sections are a known failure point in image-to-model pipelines.
- Repair if needed. Thin limbs, non-manifold edges, or floating pieces get thickened or reconnected before the file is ready for the printer.
- Preview and approve. You see a rendered model and can request reasonable adjustments before we commit to printing.
- Print, finish, and ship. Once approved, the model is printed, cleaned up, and packaged.
A parent-maker workflow documented in one step-by-step conversion guide follows this same basic shape: scan or photograph the art, convert it, repair minor mesh issues, then print. We apply the same logic, with our drawing-to-3D-model workflow handling the conversion and repair steps on our end so you are not editing meshes yourself.
Typical orders involve one preview round before approval, though a second look is available if the first draft needs a tweak. Once you approve the file, we move to printing. Rush processing is available for an additional fee when you need the keepsake sooner.
Pro Tip: Approve the preview only once the pose and proportions look right to you, since changes get harder to make once printing starts.
How to Prepare a Drawing for the Best Result
A little prep work before you upload makes a real difference in how closely the final model matches the original art.
- Photograph the drawing in even, natural light, with no harsh shadows crossing the lines.
- Lay the drawing on a plain, contrasting background so the edges are easy to distinguish.
- Use a flatbed scanner instead of a photo when the paper is wrinkled or the lighting is inconsistent.
- Simplify or trace over very busy drawings so the main shapes stay legible, since fine scribbles tend to get lost in conversion.
- Save the file as a JPEG or PNG at a resolution sharp enough that small details are not blurry when zoomed in.
- Add a short note about which colors go where, especially if the original drawing used shading or blending that is hard to read.
Line art with clean, closed shapes tends to convert more predictably than loose sketches, which is part of why our line art to 3D guide recommends tracing over faint pencil marks before you upload. You do not need design software for this step. A phone camera and a few minutes of cleanup usually get you a drawing that converts cleanly on the first try.
Materials, Safety, and How Long the Keepsake Lasts
We print in non-toxic PLA, a material chosen because it holds fine detail well and is widely used for hobby and gift prints. Prusa's PLA guidance notes that PLA is easy to print and suited to detailed models, but it softens at temperatures above roughly 60°C, so a keepsake left in a hot car or near a sunny window can warp over time. PLA is also more brittle than some other filaments and can fade under prolonged UV exposure.
Layer lines, the fine ridges visible on any 3D print, can trap dust and are not something you want on anything meant for food contact. Prusa's food-safe printing article explains that true food safety requires specialized coatings or dedicated hardware, well beyond what a standard decorative print offers. Our keepsakes are made for display and play, not for serving food, and we avoid small detachable parts that could pose a choking risk for young children. For more on handling and cleaning, our non-toxic PLA safety overview covers particle exposure during printing and simple handling tips once a piece is finished.

Design choices also affect durability. Thicker walls and rounded transitions between limbs or features, rather than thin, sharp joins, hold up better to the drops and squeezes that come with being a kid's favorite object on a shelf.
Pricing, Sizing, and How Long It Takes
Our custom 3D models run $49.99 to $77.99 one-off, depending on the options you choose.
- Size drives most of the price difference, since larger prints use more material and print time.
- Color complexity matters too, with multi-color pieces taking more work than a single-color print.
- Finish choices, like a smoother surface, can add to the base cost.
- Rush processing is available for $10 one-off when you need the keepsake faster than standard turnaround.
Standard production takes a few days once you approve the preview, plus shipping time. If the AI draft needs manual cleanup, such as thickening a thin arm or closing a gap in the mesh, that can add a short delay before the file is ready to print. For sizing, a small desk figure or ornament usually needs less material and prints faster than a larger display piece meant to be a centerpiece on a shelf.
Caring for and Displaying the Finished Piece
A quick wipe with a soft, dry cloth keeps the print looking clean. Keep it away from direct heat sources and long stretches of direct sunlight, since PLA can soften or fade under both.
- Light sanding can smooth rough edges if the print will be handled often.
- A coat of acrylic paint or clear epoxy adds gloss and a bit of extra surface durability.
- Mount the piece on a small wood base for a desk display.
- Add a loop or ring for an ornament, or a small clasp if you want it as a keychain.
- A shadow box works well if you are pairing the print with the original drawing as a combined keepsake.
Pro Tip: Pairing the finished print with the original drawing in a shadow box turns both into a single gift instead of two separate objects.
Why These Keepsakes Matter to Us
A child's drawing usually lives on a refrigerator for a week before it gets lost in a drawer. Turning it into something physical and lasting changes that, and it is a big part of why we built our process around AI conversion, a preview step, and non-toxic PLA. Every order goes through the same simple approval flow: upload, preview, adjust if needed, approve, print.
— Ian
Start Your Keepsake With 3D Print Pics
The process involves uploading a photo of the drawing, converting it with AI, reviewing the model preview, and upon approval, printing and shipping. Rush processing is available if you need it sooner.

- Upload your drawing and pick your color options.
- Review the 3D preview before anything prints.
- Approve the design and choose standard or rush processing.
Ready to see your child's drawing as a physical keepsake? Start your custom 3D model today.
FAQ
How long does it take to turn a drawing into a 3D keepsake?
Standard orders typically take a few days for production once you approve the preview, plus shipping time. Rush processing is available for an added fee if you need it sooner.
What file type works best for uploading a drawing?
A clear JPEG or PNG photo, taken in even lighting against a plain background, works well. A flatbed scan is a good alternative for wrinkled paper or uneven lighting.
Is the material safe for kids?
We use non-toxic PLA, a material commonly chosen for hobby and gift prints, but these keepsakes are made for display and play, not food contact. Food-safe 3D printing requires specialized coatings or hardware that go beyond a standard decorative print.
Will the 3D model look exactly like the original drawing?
AI conversion captures the main shapes and colors closely, though a fully flat drawing is reinterpreted into a three-dimensional form, so some artistic interpretation is normal. You see a preview before anything prints, so you can request reasonable adjustments first.
What if the AI model has errors, like a missing or thin part?
Thin limbs or small gaps are a known issue with AI-generated 3D drafts, and these get repaired before printing. You review the finished preview, not the raw draft, so these fixes happen before you ever see the model.
Sources
- New AI Image-to-Model Generator Promises Perfect STL Files, We Put It to the Test | All3DP
- PLA | Prusa Knowledge Base
- Turning kids' drawings and sculptures into 3D prints: A parent-maker guide