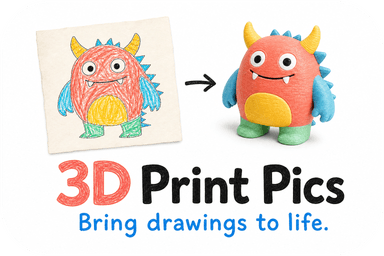
"3D printing for schools" here means turning a class photo, a child's drawing, or a school logo into a physical 3D printed keepsake, not setting up printers as classroom hardware. Teachers, parents, and students use this for end-of-year gifts, class awards, and student-art displays. The usual path runs through four steps: upload, AI-assisted modeling, human refinement, and a preview you approve before anything prints.
TL;DR:
- Use tightly cropped, evenly lit images with plain backgrounds; photograph drawings straight on, darken faint lines, and use vector files for sharper logos.
- Notify parents before collecting files, offer a clear way to decline, record responses, and distinguish family gifts from promotional use, which may require explicit permission.
- A human artist corrects distortions after AI modeling, and you must approve the preview before printing; schedule time for refinement, shipping, and possible reprints.
- These keepsakes are display pieces, not certified toys; request rounded edges, remove tiny detachable parts, and label them for display around younger children.
- For class orders, submit files together and use smaller sizes or one color to reduce per item costs; rush processing costs extra.
Table of Contents
- How the process works: the typical four-step workflow
- Preparing photos and student artwork for the best results
- Privacy and permissions: classroom-ready consent and opt-out workflows
- Safety and materials: why non-toxic PLA matters and how to treat the finished piece
- Ordering, customization, timeline, and classroom budgeting tips
- A simple classroom project plan teachers can run
- Maintenance and basic troubleshooting of 3D printers in a school environment
- Training and support resources for teachers using 3D printing technology
- What I've learned watching schools run these projects
- How 3D Print Pics fits into a school keepsake project
- FAQ
- Sources
How the process works: the typical four-step workflow
Turning a photo or drawing into a finished keepsake follows a predictable sequence, and knowing it ahead of time helps you plan around a school calendar instead of scrambling before a deadline.
- Upload a clear photo or scanned drawing. A well-lit, well-cropped image gives the model generation step the best starting point.
- AI-assisted model generation produces a fast first draft. This stage converts the flat image into a rough 3D shape in a short amount of time.
- A human artist refines the geometry and proportions. This step catches distortions, fixes thin or awkward areas, and cleans up detail the AI pass missed.
- You review and approve a preview before printing and shipping. Nothing goes to the printer until the design matches what the class or parent expects.
That human refinement step matters for school orders specifically, since class photos and children's drawings often have uneven lighting, cropped edges, or inconsistent line weight that a purely automated process would carry straight through to the final print.
Preparing photos and student artwork for the best results
The single biggest factor in how a keepsake turns out is the quality of what gets uploaded, not any setting on the printer itself. A few minutes of prep before submission saves a round of back-and-forth later.
- Crop tight around the subject. Loose framing adds background noise the model has to interpret.
- Use even, front-facing lighting. Backlit photos flatten facial features and confuse depth mapping.
- Keep backgrounds plain. Busy backgrounds compete with the subject for the model's attention.
- Flatten artwork and photograph it straight on. A drawing shot at an angle introduces distortion that carries into the 3D shape.
- Boost contrast on line art. Faint pencil lines are harder to translate into clean geometry than bold, dark strokes.
- Supply high-contrast PNGs for lithophane-style prints. Light-based keepsakes depend on print thickness, and tight cropping and simplified backgrounds matter more than raw resolution for these.
For logos, a vector or SVG file produces cleaner edges than a scanned bitmap, and our guidance on turning line art into a print-ready model walks through why that matters. Pixel art has its own quirks too. A clean, unscaled PNG works better than one that's been stretched or compressed, and our pixel art conversion tips cover the common pitfalls.
Pro Tip: Spend five extra minutes cropping and adjusting contrast before you upload. That input prep does more for the final print than any setting further down the process.
Privacy and permissions: classroom-ready consent and opt-out workflows
Before collecting a single photo for a class project, it helps to have a simple consent process in place. This protects students, keeps parents informed, and avoids awkward conversations after prints are already made.
- Notify parents in advance about how a child's photo or artwork will be used, and offer a clear opt-out.
- Keep a written record of who opted out and when, so the information doesn't rely on memory later.
- Separate internal keepsakes from promotional use. A photo turned into a personal gift for a family is different from one used in a school newsletter or fundraiser display, and promotional use typically calls for an explicit opt-in or a clearly offered opt-out.
- Time the notice early. Send it at the start of the school year or ahead of the specific photo event, and send a reminder for students who join late.
This approach lines up with guidance from the ICO on taking photographs in schools, which recommends transparency, opt-outs, and record-keeping as baseline practice. Rules on consent and data handling vary by country, so it's worth checking your own region's requirements before launching a school-wide project.
Safety and materials: why non-toxic PLA matters and how to treat the finished piece
Most photo-to-keepsake services print in non-toxic PLA, a plastic chosen for being visually clean and low-risk for classroom and home use. That makes it a sensible default for something a student will keep on a shelf or hand to a parent.
A keepsake is not automatically a toy. Most 3D-printed keepsakes made from artwork are designed as display pieces rather than certified toys, and thin or sharp protrusions, like a raised arm in a drawing or a pointed logo edge, are part of why.
A few adjustments keep pieces safer for younger hands:
- Ask for rounded edges where a design has sharp points.
- Request the removal of tiny detachable parts that could become a choking hazard for younger siblings in the home.
- Label the piece "display only" when it's going to a classroom shelf or a family mantel rather than a toy box.
Ordering, customization, timeline, and classroom budgeting tips
Once the artwork or photo is ready, ordering for a classroom involves a few extra decisions beyond a single family gift: sizing for a group, choosing consistent colors, and timing a batch so everyone's keepsake arrives together.
- Pick a size and color scheme. Options typically range from small desk pieces to larger display models, with up to seven color choices in non-toxic PLA.
- Decide between a full 3D model or a bas-relief style, which works well for flatter artwork like a class drawing or logo.
- Submit as a batch when ordering for a whole class, which simplifies shipping and keeps the project on one timeline.
- Build in time for model generation, refinement, and your preview approval, then add printing and shipping; rush processing is available for an additional fee when a deadline is close.
To keep per-item costs down for a class order, smaller sizes and single-color runs are usually the cheapest route, and batching shipment for the whole group avoids paying for individual delivery. Exact pricing, including the current range for custom models and rush processing, is listed on our ordering page.
A simple classroom project plan teachers can run
A photo-to-keepsake project works as either a quick single event or a term-long unit, depending on how much classroom time you want to dedicate to it.
Single-event keepsake (one class period plus admin time):
- Students bring in or create a drawing, or a class photo is taken.
- Teacher collects and labels files by student name.
- Admin confirms consent records are in order before anything is submitted.
- Files are submitted as one batch order.
- Teacher reviews the design previews before giving final approval.
- Finished keepsakes are distributed, often timed to an end-of-year event.
Term-long art-to-print project (deeper curriculum tie-in):
- Students develop artwork over several weeks as part of a unit.
- Final pieces are photographed under consistent, even lighting.
- A class discussion covers how the AI model generation and human refinement steps work.
- Students see their own preview before it's approved, closing the loop between creation and finished object.
A few logistics make batch submissions smoother:
- Use a consistent file naming convention, such as student last name plus class period.
- Share a short parent communication template explaining the project timeline and consent process.
- Plan a display location in advance, whether that's a hallway case or a take-home table at a school event.
Maintenance and basic troubleshooting of 3D printers in a school environment
Schools running their own printers for any part of a keepsake project should expect routine upkeep, the same as any shared equipment in a classroom. Keeping the print bed clean and level is one of the most common fixes for a failed print, since warped or uneven surfaces cause the first layer to lift or shift. Nozzle clogs are another frequent issue, usually resolved by a cold pull or a quick clean when print quality starts looking stringy or incomplete.
Filament storage also affects reliability. PLA absorbs moisture from the air over time, and damp filament tends to produce brittle or bubbly prints, so keeping spools in a dry, sealed container between uses helps avoid wasted attempts. A basic maintenance routine, wiping down rails, checking belt tension, and clearing dust from fans, catches small problems before they turn into a failed batch mid-project.
For a school managing dozens of student files at once, it's worth building in slack time for at least one reprint per batch. Even with careful prep, a stray print failure is common enough that a buffer in the schedule prevents one hiccup from delaying an entire class's keepsakes. Keeping a simple log of what went wrong and what fixed it, whether that's a leveling issue or a clogged nozzle, saves time the next time the same problem shows up.

Training and support resources for teachers using 3D printing technology
Teachers new to this kind of project don't need deep technical training to run it successfully, since the heaviest lifting, model generation and refinement, happens outside the classroom. What helps most is familiarity with the basics: how to crop and prepare an image, how the preview and approval step works, and how to set realistic timelines around a school calendar.

A few resources make that learning curve shorter. Our blog walks through specific conversions step by step, including turning a scanned drawing into a 3D model and working from a single photo to a finished figurine. These cover the kind of practical questions that come up during a first class project, like how to photograph artwork or what file types work best.
Beyond the mechanics of file prep, students benefit from understanding how their own work moves from a drawing to a physical object. Pairing a keepsake project with a short lesson on AI-assisted design, even at a basic level, gives students context for what happens between their upload and the finished print. For teachers managing related student work, a tool like AI-powered study support for structuring notes and materials can help students document their creative process alongside the physical project.
What I've learned watching schools run these projects
The schools that get the best results treat the preview step as a checkpoint, not a formality. Looking at the design before it prints catches the small things, a cropped ear, a distorted line, before they become a finished piece nobody's happy with. The other pattern I notice is that consent and communication, done early, make the entire project run smoother than any technical step in the process.
Non-toxic PLA and a clear preview aren't flashy details, but they're the two things that let a teacher hand a keepsake to a parent without worrying about either safety or surprises.
— Ian
How 3D Print Pics fits into a school keepsake project
For a classroom project, the appeal is removing the guesswork: you upload a photo or scanned drawing, see a preview before anything prints, and get a piece made from non-toxic PLA in a size and color that fits your budget.

- Upload and preview first. You approve the design before it goes to print, which matters when you're managing a whole class of files.
- Choose from up to seven colors in non-toxic PLA, suited for display pieces students and families will keep.
- Order as a batch or request rush processing when a school event deadline is close.
If you're ready to see how a student drawing or class photo turns into a keepsake, visit our ordering page to upload a sample image and get a preview, or check our affiliate program if your school or PTO wants to run a fundraiser around it.
FAQ
Do I need parental consent before submitting a student's photo?
Yes, it's best practice to notify parents in advance about how a photo will be used and offer an opt-out, keeping a record of who declines. This is especially important when the keepsake involves anything beyond a private, internal gift for the family, as ICO guidance on school photos outlines.
Is a 3D printed keepsake safe for young children to play with?
These keepsakes are generally designed as display pieces rather than certified toys, since thin or sharp features common in artwork-based designs aren't suited for rough handling. Requesting rounded edges and avoiding tiny detachable parts, then labeling the piece "display only," is the safer approach for younger kids.
What kind of photo or drawing works best for a 3D print?
A tightly cropped, evenly lit image with a plain background gives the cleanest result, since input quality affects first-print success more than image resolution. For line art or logos, high contrast and, where possible, a vector file produce the sharpest final model.
How long does it take to go from photo to finished keepsake?
Timing covers model generation, a human refinement pass, your preview approval, and then printing and shipping, with rush processing available for an additional fee when a deadline is close. Exact turnaround and pricing details are listed on our ordering page.
Can a whole class order keepsakes together?
Yes, batch ordering is a common approach for class projects, letting a teacher submit multiple student files together and ship them as one group. Choosing smaller sizes or a single consistent color across the batch is a simple way to manage the overall cost.
Sources
- Taking photographs: data protection advice for schools — ICO
- 3D printing lithophanes: practical tips — Obico