
Yes, you can 3D print pixel art, and you have three practical routes to get there: snap-together block kits, vector-extrusion converters, or full voxel pipelines. Block kits suit quick, colorful builds with zero modeling skill. Extrusion converters make crisp flat plaques and badges fast. Voxel pipelines produce true volumetric detail for figurines and mosaics. Print a single test tile before committing to a full sprite.
TL;DR:
- Block kits are ideal for quick, colorful pixel art assembly and require no advanced modeling skills, making them suitable for beginners.
- Extrusion converters efficiently turn flat sprites into single-color or multi-color flat plaques, best for badges or logos on single-nozzle printers.
- Voxel pipelines produce fully volumetric 3D models, perfect for figurines or mosaics that need to be viewed from all angles and require specialized hardware.
- Printer hardware dictates the pipeline choice, with extrusion suited for single-nozzle machines and voxel methods requiring multi-material printers like PolyJet or AMS systems.
- Using STL or STEP files ensures compatibility with most slicers, but for multi-color projects, OBJ, glTF, or GLB files carrying material info are necessary, and layers should be checked for alignment.
Table of Contents
- Pixel Art 3D Print Tools: Kits, Converters, and Voxelizers
- Extrusion Versus Voxel Pipelines: Which Fits Your Printer?
- What File Formats Does Your Slicer Actually Need?
- Printer Settings That Make Pixel Art Actually Look Good
- Scaling Up: Managing Large Pixel Art Mosaics
- How Do You Turn a Pixel Sprite Into a Printed File?
- When Should You DIY Versus Order a Custom Model?
- Skip the Learning Curve With 3D Print Pics
- Sources
- FAQ
Pixel Art 3D Print Tools: Kits, Converters, and Voxelizers
Before picking a workflow, know what each tool category actually outputs, because they are not interchangeable.
Printable block kits work like digital LEGO. You assemble a grid of pre-modeled cube files, color each one by filament swap or paint, and snap or glue them into a finished piece. Kits like the Pixel Art Building Blocks project use single perimeters and no infill to keep material use and print time low, since the blocks are purely decorative shells.
Sprite converters take a flat PNG and extrude it along one axis, turning a game sprite into a slab with raised or recessed pixels. Tools such as Pixto!Mesh export directly to STL, OBJ, glTF, and FBX, so you get a printable file in minutes without touching CAD software.
Voxelizers go further, building genuine volumetric pixels rather than a flat extrusion. This is the route for figurines that need to read as 3D from every angle, not just the front.
Lithophane and stacked-layer methods handle photo-based projects, layering separate STL files by color channel so a backlit piece reveals detail through translucency.
- Block kits: fastest to assemble, easiest to recolor, best for beginners
- Sprite converters: quick single-material plaques and badges
- Voxelizers: full 3D detail, best for figurines and display pieces
- Lithophane stacks: backlit or multi-tone photographic effects
Extrusion Versus Voxel Pipelines: Which Fits Your Printer?
The real decision point is hardware, not artistic ambition. Extrusion-from-vector work maps each color in your sprite to a flat, non-overlapping region, then gives that region its own height. It is efficient on a single-nozzle printer because you only swap filament a handful of times, and the VectoSolve non-overlapping layers method exists specifically to prevent the boolean errors and z-fighting that ruin flat multi-color prints.
Voxel pipelines assign color and even material at the level of an individual voxel, the way GrabCAD Voxel Print does on PolyJet machines. That precision needs specialized hardware most hobbyists don't own, plus far more file prep, since you are managing a bitmap stack instead of a handful of flat regions.
- Extrusion: fast, single-nozzle friendly, best for flat graphics and logos
- Voxel: highest color fidelity, needs multi-material printers (AMS, PolyJet)
- Time cost: extrusion prints in under an hour for small badges; voxel projects run much longer due to layer complexity
Pro Tip: Cap your color count to however many filament slots or swap stations you actually have before you start vectorizing. Designing for eight colors on a three-slot AMS just means more manual intervention later.
What File Formats Does Your Slicer Actually Need?
Your slicer only cares about geometry, so STL and STEP files are the safe default. Both formats carry the shape of the model and nothing else: no color, no material, no print settings. The slicer generates all machine instructions separately.
OBJ, glTF, and GLB carry more scene information, including color and material hints, which matters if your converter tags each region with a material ID for a multi-material printer. If you're stacking several files for a voxel or lithophane build, every file needs the identical X/Y bounding box, or your layers won't align once you drop them into the slicer together. Run a mesh check for watertight geometry and correct normals before slicing, and decimate any voxelizer output that comes out needlessly dense.
Printer Settings That Make Pixel Art Actually Look Good
Layer height decides whether your pixels read as clean cubes or blurry mush. For most pixel block prints, 0.2 to 0.3 mm layers strike the right balance of speed and definition. Drop to a finer layer height only when you're printing small voxel figurines where surface detail actually shows.
Hollow pixel blocks don't need strength, so skip infill entirely and print with a single perimeter. That single change, drawn directly from printable block kit design notes, can cut material use and print time dramatically on a large mosaic. Bevel the top edge of each pixel block. It hides the slightly rounded look of a first layer and reinforces the blocky aesthetic instead of fighting it.
- Layer height: 0.2 to 0.3 mm for standard blocks, finer for voxel detail work
- Infill: 0% with a single perimeter for hollow decorative blocks
- Bevels: chamfer pixel tops to mask first-layer imperfections
- Color changes: schedule M600 pauses or AMS assignments before slicing, not mid-print
If you're on a single-nozzle machine without an automatic material system, a manual filament-change workflow using precisely timed M600 pauses is the standard fix, and it works reliably once you've planned your color-change layers in advance. For joining finished pieces, a plastic-safe adhesive beats clip joins on anything that will be handled often, since clips loosen with repeated flexing.
Scaling Up: Managing Large Pixel Art Mosaics
A wall-sized mosaic is really dozens of small prints that have to agree with each other, and that agreement lives in your file management. Use modular substrates or edge and corner joiners so tiles lock together without visible gaps, and number every batch and part as you print it. Losing track of which tile is which becomes a real problem once you're twenty colors deep.

Keep every stacked file at identical X/Y extents. A single mismatched bounding box causes z-fighting or misalignment the moment two layers meet, an issue that gets harder to spot the larger your mosaic grows. A consistent, deterministic naming convention for your files avoids exactly this kind of assembly error and saves real time at the slicer stage. For anything going outdoors, choose a UV-stable filament and weatherproof adhesive; standard PLA blocks left in direct sun will warp and fade faster than an indoor display piece ever would.
How Do You Turn a Pixel Sprite Into a Printed File?
Pick your pipeline before you open any software. A single flat badge wants extrusion. A wall mosaic wants modular blocks. A display figurine wants a voxel pipeline. Match the tool to the outcome first, and everything downstream gets simpler.
- Clean your source PNG: limit the palette, remove the background, and save a master file you won't overwrite.
- For extrusion or badge projects, vectorize the sprite into non-overlapping regions, one per color, so your slicer never has to resolve overlapping shells.
- For full 3D figurines, run the sprite through a voxelizer instead, which builds volumetric pixels using bitmap stack methods instead of a flat extrusion.
- Export as STL, OBJ, or glTF depending on whether your printer setup needs material tags.
- Run a mesh check for watertight geometry, then set your slicer's layer height and any planned color-change points.
- Print one small test tile before committing filament and hours to the full piece.
Pro Tip: Save your vectorized master file separately from your print-ready export. When you inevitably want to resize or recolor the project later, you'll be glad you didn't overwrite the editable version.
When Should You DIY Versus Order a Custom Model?
DIY makes sense when you have time, a simple color palette, and a printer that matches your chosen pipeline. It stops making sense the moment you're staring at a childhood photo or a company logo you can't confidently vectorize yourself, or you need a preview before committing to material and hours of print time. That's the gap a done-for-you, AI-assisted conversion service is built to close, especially for one-off keepsakes rather than repeatable production runs.
— Ian
Skip the Learning Curve With 3D Print Pics
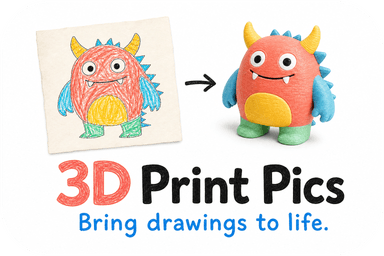
If vectorizing a photo or wrangling a voxelizer sounds like more software than you signed up for, 3D Print Pics turns an uploaded picture, kid's drawing, or logo into a 3D model automatically using AI-powered generation, no design skills required. You pick from up to seven color options in non-toxic PLA, approve a model preview before anything gets printed, and choose your size. It's built for exactly the jobs a DIY pipeline struggles with: a pet photo, a child's artwork, a business logo for promotional swag.

Custom model pricing and rush processing fees are available on the 3D Print Pics website. Upload your image, review the preview, and let 3D Print Pics handle the conversion and printing from there.
Sources
- Pixto!Mesh by dacuza
- The Voxel Workflow
- Introducing GrabCAD Voxel Print
- Image to multicolor 3D print (VectoSolve blog)
FAQ
Is 3D Printing Warhammer 40k Models Illegal?
Printing copyrighted miniatures without a license infringes the intellectual property rights of the copyright holder in most countries. Personal use may fall into gray areas depending on local law, but selling or distributing such prints is legally risky almost everywhere.
Is It Illegal to 3D Print Anything in Particular?
Most objects are legal to print, but firearms components, currency, and copyrighted or trademarked designs carry real legal restrictions depending on your country. When in doubt about a specific object, check your local regulations rather than assuming a hobbyist exception applies.
Is Designing Pixel Art Harder Than Regular 3D Modeling?
Pixel art is generally easier to start with because you're working on a flat grid instead of sculpting freeform geometry. Converting that pixel art into a clean, printable 3D file adds its own challenges, particularly around color separation and avoiding overlapping regions, as the VectoSolve extrusion method addresses directly.
How Do You Turn Pixel Art Into a 3D Model?
You either vectorize the sprite into non-overlapping color regions for extrusion, or run it through a voxelizer for full volumetric detail, then export as STL, OBJ, or glTF for your slicer. If you'd rather skip the file prep entirely, 3D Print Pics converts an uploaded image into a model automatically with a preview step before printing.