Use SVG extrusion for logos, text, and flat graphics; use AI volumetric reconstruction for sketches, portraits, and organic characters. The first route produces clean STL or 3MF files in minutes; the second takes a bit longer but handles curves and shading a flat trace cannot, pick your route based on the art, then open Fusion 360, FreeCAD, or an AI model generator to start.
TL;DR:
- SVG extrusion is ideal for fast, straightforward conversion of logos and icons, producing printable STL or 3MF files within minutes.
- AI volumetric reconstruction handles complex, organic shapes like characters or shaded sketches, but requires more cleanup before printing.
- Starting with a high-contrast, clean scan of your art prevents conversion failures, and closed, solid paths ensure successful extrusion.
- Export formats matter: use STL for single objects and broad compatibility, while 3MF preserves multiple parts and color data for more complex models.
- For simple, flat line art, fusing strokes and maintaining adequate wall thickness improve print quality and reduce failures.
Table of Contents
- SVG extrusion vs AI reconstruction: which workflow fits your art
- Prepping your line art before you touch any software
- SVG to CAD extrusion: the step-by-step recipe for flat art
- AI volumetric reconstruction: turning sketches into sculptural models
- Choosing the right export format and fixing mesh problems
- Print-ready design rules for converted line art
- How 3D Print Pics turns customer art into a physical keepsake
- A simple checklist for going DIY or handing it off
- Order a custom 3D print without touching a single CAD tool
- Sources
- FAQ
SVG extrusion vs AI reconstruction: which workflow fits your art
Line art conversion into 3D splits into two practical categories. The first is heightmap or extrusion, where a flat vector graphic gets pushed into a third dimension, like stamping a logo into a block. The second is volumetric AI reconstruction, where software infers depth and form from a sketch to build a rounded, sculptural mesh. According to All3DP's breakdown of the two approaches, extrusion works best for logos, text, and icons, while AI reconstruction suits characters and organic art. SVG-based extrusion delivers near instant results on geometric shapes, while AI generation typically finishes in minutes for more complex organic forms.
Extrusion is the right call when your art is already flat and geometric: a company logo, a monogram, a simple icon. AI reconstruction earns its slower pace when you're working from a child's crayon drawing of a dinosaur or a pencil portrait with shading and depth cues a flat trace would flatten into nonsense.
- SVG extrusion: fast, predictable, best for logos and icons, output is a simple STL or 3MF ready to slice within minutes.
- AI reconstruction: slower, produces rounded and organic forms, needs more cleanup before it's print ready, but handles shading and complex silhouettes that extrusion cannot.
Prepping your line art before you touch any software
Bad scans cause more failed conversions than bad software. Start with a clean capture and you'll save yourself an hour of mesh repair later.
- Scan or photograph at a resolution of at least 300 DPI, with even lighting and a plain background that contrasts sharply with your ink or pencil lines.
- Decide whether your art uses filled regions or open strokes. Filled shapes convert directly into solid geometry, while thin strokes need to be thickened or closed first or the extrusion tool will read them as open, unprintable paths.
- Clean the image before conversion: raise contrast, threshold out shadows and smudges, and close any gaps where lines almost touch but don't quite meet.
- Save your cleaned art as a high-contrast PNG or TIFF before vector tracing, since compression artifacts from JPEG can introduce jagged edges in the trace.
Pro Tip: Zoom in on corners and line intersections before you export. A one-pixel gap that's invisible at normal zoom will show up as a broken path once you're inside your CAD software.
SVG to CAD extrusion: the step-by-step recipe for flat art
This route is the fastest for logos, icons, and anything drawn with clean, closed lines.
- Vector trace your cleaned raster image into an SVG using a trace tool, keeping the path count low to avoid jagged, over-segmented curves.
- Import the SVG into Fusion 360, FreeCAD, or Tinkercad as a sketch. In Fusion 360, the Insert SVG workflow places your art on a sketch plane where you can scale, rotate, and position it before building geometry.
- Scale the sketch to real world units and confirm every path is closed. An open path will fail to extrude into a solid body.
- Extrude the sketch to your target thickness, then join separate bodies into one solid. Add a flat backplate underneath if your design has disconnected shapes that need to stay physically joined.
- Export the finished model to STL or 3MF for slicing.
Watch for two common problems at the CAD stage: self-intersecting paths from a messy trace, and floating islands where a shape wasn't joined to the main body. Both show up as extrusion errors and both trace back to the vectorizing step, so a second pass through your trace tool often fixes them faster than troubleshooting in CAD.
According to Autodesk's own documentation, Fusion's Insert SVG workflow creates sketch geometry that can be extruded directly into bodies ready for export and printing, which makes it one of the more direct paths from flat art to a printable file.
AI volumetric reconstruction: turning sketches into sculptural models
Choose this route for character art, shaded pencil sketches, or any drawing with a complex outline that implies depth rather than stating it flatly. AI reconstruction tools infer volume from a 2D image, which is exactly what a flat extrusion cannot do with a rounded face or a folded wing.
- Upload a single, high-contrast image for simple shapes, or provide multiple angles of the same character when the tool supports multi-view input for a more accurate mesh.
- Set the target mesh density based on your printer's resolution: a denser mesh captures more detail but takes longer to process and clean up.
- Expect the raw output to need cleanup. AI generated meshes commonly come out as thin shells or with non-manifold geometry that a slicer will reject outright.
- Run the mesh through a remesh and "make solid" pass, decimate any excess polygon count, and check for stray floating geometry before export.
Pro Tip: If you're using the model for visualization only, not printing, you can skip heavy mesh repair and just check that textures map cleanly. Printing demands a fully solid, watertight mesh; a render does not.
Blender is a solid free option for this cleanup stage, since its sculpting and remesh tools handle the kind of organic topology fixes AI output usually needs, and it's a natural stop after generation if you want more control than a one-click repair gives you.

Choosing the right export format and fixing mesh problems
STL remains the most widely supported format across slicers, but it has limits. According to Prusa's file format guide, 3MF is the better choice for multi-object projects or when you need to preserve metadata between tools, since 3MF supports multiple objects natively while STL flattens everything into a single flat mesh.
- Export to STL when you have a single simple object and just need broad compatibility across older slicers.
- Export to 3MF when your model has several separate parts, needs specific colors or supports data preserved, or you're moving between multiple software tools.
- When a mesh comes in broken, load it into a viewer first to spot the problem, then use Meshmixer or Windows 3D Builder for one-click repairs of holes and non-manifold geometry before you re-export.
- Let your slicer's built in auto-repair catch anything minor as a last step, not a first one, since it can mask problems that are better fixed at the mesh level.
If you need a quick format swap without installing new software, a free browser-based 3MF to STL converter can save a step when a tool only accepts one format. When a model has multiple shells that print better as separate parts, split them in your mesh editor and re-export each as its own file rather than forcing a single merged STL.
Print-ready design rules for converted line art
A mesh that looks fine on screen can still fail on the print bed. Line art conversions have their own failure points worth checking before you slice.
- Keep wall thickness at a minimum of roughly two to three times your nozzle diameter, since thinner walls from delicate line strokes tend to warp or not print at all.
- Fuse disconnected strokes into a single solid with a thin backplate underneath. This is the single most reliable fix for line art that would otherwise print as scattered, disconnected fragments.
- Orient the model so thin protruding lines print flat against the bed rather than standing upright, and add small support tabs at any fragile overhang.
Pro Tip: When in doubt about wall thickness, print a small test tile of your thinnest line first. It costs a few minutes of filament and saves you from a full failed print.
How 3D Print Pics turns customer art into a physical keepsake
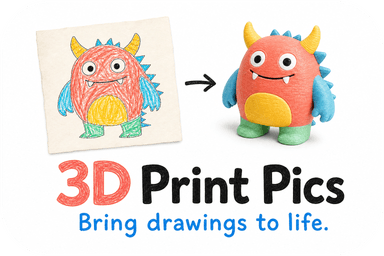
Some services handle this entire pipeline for customers who would rather skip the CAD work. You upload a drawing, photo, or logo, and an AI-generated preview shows the model before you commit to an order. Customers can choose from multiple color options in non-toxic PLA and pick a size, all before checkout. This process suits those who want a finished keepsake without learning mesh repair or extrusion software.

A simple checklist for going DIY or handing it off
Ask yourself four questions: how complex is the art, how much time do you have, what finish do you expect, and what's your budget for software or time spent learning it. Simple, flat, urgent jobs favor a quick DIY extrusion; detailed or sentimental pieces favor a service.
— Ian
Order a custom 3D print without touching a single CAD tool
If your line art is a child's drawing, a pet portrait, or a logo you want as a physical object rather than a file to troubleshoot, 3D Print Pics turns the whole process into four steps: upload your image, review the AI generated preview, choose your color and size, and check out.

Custom models are available with pricing that depends on the specifics of the order, and rush processing is offered at an additional cost to speed up production. Every print uses non-toxic PLA, so it's safe for a kid's shelf or an office desk. Start your order and see your art rendered in 3D at 3D Print Pics.
Sources
For deeper technical detail, see Prusa's guides on supported file formats and modeling with 3D printing in mind, plus 3MF's metadata advantages.
- PrusaSlicer simply explained | All3DP
- Supported file formats | Prusa Knowledge Base
- How to repair corrupted 3D models for printing | Prusa Blog
FAQ
How do I turn art into a 3D model?
Vector trace flat art into an SVG and extrude it in software like Fusion 360 or FreeCAD, or upload a sketch to an AI reconstruction tool that infers volume and shape automatically. The right choice depends on whether your art is flat and geometric or organic and shaded.
How do I make a 3D line drawing print ready?
Close any open paths, fuse loose strokes into a single solid with a backplate, and check wall thickness before slicing. A manifold, watertight mesh is required, since thin shells or holes will cause slicing errors.
Can ChatGPT convert an image to a 3D model?
ChatGPT itself does not generate 3D meshes, but AI powered 3D reconstruction tools built for that purpose can turn a single sketch or photo into a volumetric model. Those tools still typically need mesh cleanup before the result is printable.
How do I turn a sketch into a 3D print?
Clean and scan your sketch at high contrast, then run it through an AI volumetric reconstruction tool suited to organic art, since a flat extrusion won't capture shading or curves. After generation, repair the mesh with tools like Meshmixer before sending it to your slicer.
What file format works best for a converted line art model?
STL is the most widely compatible option across slicers, but 3MF is better for multi-part models or when you need to preserve color and metadata. Choose 3MF when your project has more than one separate piece.