3D printing works in art class because students design something, hold it, and fix what went wrong. Start with one project, such as a name tag, in single-color PLA, model it in Tinkercad, and follow NIOSH-based ventilation guidance before you hit print. Pick one starter project below, run it with a small group first, then scale up.
TL;DR:
- Build a labeled print queue with student names and class periods, a visible schedule, one pickup tray, and a bin for unclaimed work.
- PLA still releases ultrafine particles and volatile compounds, so use an enclosed printer with outdoor exhaust, a ventilated room, or local exhaust.
- Assess sketches, revisions, printability, and reflection rather than print quality alone; students should not lose credit when mechanical failures ruin a print.
- Ask students to draw with bold, enclosed lines because thin or broken marks convert poorly into printable models.
- Filament costs $10 to $160 per spool, and training, supervision, maintenance, and spare parts add expenses teachers often underestimate.
Table of Contents
- 1. Eight starter 3D art projects you can run fast
- 2. A bigger project bank, sorted by complexity
- 3. How to run printing without chaos
- 4. Materials, safety, and setup for school use
- 6. Fixing bad prints and finishing student work
- 7. Bringing student artwork into 3D printing projects
- 8. Building creativity and critical thinking through making
- 9. Assessing learning and project outcomes
- 10. A teacher's note on where to begin
- 11. When you need finished keepsakes without printing in class
- FAQ
- Sources
1. Eight starter 3D art projects you can run fast
These projects work with single-color PLA and almost no CAD experience. Print times vary with the project and printer.
- Wall hook (grades 3–8, about 30–60 minutes): a simple shape students personalize with an initial or pattern.
- Name tag or pencil topper: a quick win for younger students.
- Marble maze (6–12, 1–3 hours): a tray with walls students plan on paper first.
- Relief print from a student drawing (3–12, 1–2 hours): a flat drawing becomes a raised surface.
- Mini figure or avatar (6–12, 1–3 hours): a small character that invites iteration.
- Paint palette (3–8, about 1 hour): a printed palette with wells for mixing, useful in the same class.
- Simple heart ring (6–12, about 30 minutes): a quick jewelry-scale design.
- Capsule prize: small trinkets students design for a class gift box.
Finishing stays simple: acrylic paint, permanent markers, or leaving the PLA raw. Experienced educators recommend starting with single-color filament projects, and we agree.
2. A bigger project bank, sorted by complexity
Once your pilot works, plan units by effort and curricular focus. MIT's K-12 Maker Lab groups classroom projects by how much students design themselves, from remixing existing models to custom CAD, which is a handy way to scaffold a semester.
Beginner (low CAD, short time)
- SVG reliefs from student line drawings.
- Seasonal decorations such as ornaments, snowflakes, or paper-cut style silhouettes.
- Classroom name tags, which double as a room-management tool.
Intermediate (introduces Tinkercad and slicing)
- Marble mazes, where students test, tweak, and reprint a track.
- Night-lights with simple circuits, pairing printed shades with basic electronics.
- Cookie cutters with stamp inserts, linking graphic design to food and culture units.
Advanced (more print time, more iteration)
- Miniature figures, built up after practice projects. One middle school art teacher shows how heart rings, necklaces, and business cards lead into a final figure, with checkpoints before students print their finals.
- Topographical reliefs, tied to geography or earth science.
- Braille cubes and architecture models, tied to accessibility and design units.
Cross-curricular examples: the MUNI lesson plan repository offers ready-made plans, sample models, and print instructions for topics from Platonic solids to topography. One-off projects need time for design and a queue wait. Figure and relief units can be planned as longer units.
If you want a ready-to-run example, our guide to classroom name tags walks through one from start to finish.
3. How to run printing without chaos
A printer in a classroom needs a system. These steps keep it manageable.
- Pilot small. Start with an after-school club or one table of students before whole-class prints, as teacher guides suggest.
- Build a print queue. Label each file with student name and class period, and post a visible schedule.
- Set pickup rules. Students collect finished prints from one labeled tray, and unclaimed prints go in a bin.
- Budget your own time. Slicing, supervising, removing prints, and cleanup all land on you.
- Keep a station kit. Scraper, spare nozzle, tweezers, sandpaper, and a roll of tape in one box by the printer.
Pro Tip: Tape a numbered card to each student's build plate position and log the number next to their name on a clipboard, so you never wonder whose print is whose.
Illinois Library resources note that teachers often underestimate post-processing and maintenance time, so plan for it up front.
4. Materials, safety, and setup for school use
Use PLA for classroom printing. It prints at lower temperatures than many other filaments and is the material most school safety guidance prefers. Even so, heated filament releases ultrafine particles and volatile organic compounds, so siting matters.
- Choose an enclosed printer where possible.
- Exhaust to the outdoors, use a separate ventilated room, or add a local exhaust hood.
- Keep the printer away from main workstations, on a level surface.
- Train authorized users and post clear signage near the printer.
- School safety guidance also points to HEPA or carbon filtration as an option and notes that overexposure to emissions can cause irritation and headaches.
Filament runs from $10 to $160 per spool, and the Washington State Department of Health says teacher time for training and supervision is often the most underestimated cost, alongside maintenance and spare parts.
6. Fixing bad prints and finishing student work
Most problems repeat. Learn the fixes once and your students will start catching them too.
- Print will not stick: clean the bed, level it, and add glue stick or tape.
- Corners lift or warp: slow the first layer, close the enclosure, and avoid large flat bases.
- Nozzle clogs: heat it, push filament through, and call tech support if it persists.
- Rough surfaces: sand lightly, then paint with acrylics or color with markers.
- Multi-part builds: glue parts with a plastic-safe adhesive after a dry fit.
Teach design-for-printability from day one: minimize supports, print on a flat face, and scale to fit the plate. Sanding, painting, and gluing take real class time, so build them into your plan. Sculptors and ceramics educators at MIT also encourage combining digital and traditional methods, so printed forms can be finished by hand.
7. Bringing student artwork into 3D printing projects
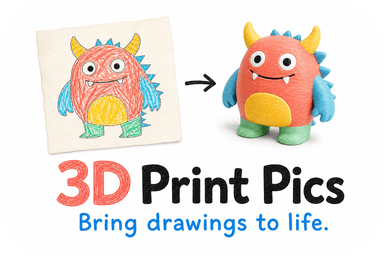
The strongest projects start from the student's own drawing, not a template. Ask students to sketch on paper first, in bold line work with enclosed shapes, because thin or broken lines convert poorly. Photograph the drawing straight on, convert it to SVG, and let each student choose whether it becomes a relief, a keychain, or a stand-up figure.

Let students keep authorship at every step. Have them write a one-sentence artist statement explaining what changed between the drawing and the print and why. That turns the printer into a medium rather than a copy machine.
A few practical strategies:
- Mix media. Combine a printed relief with ink, watercolor, or collage, so the object feels handmade.
- Print a series. One drawing can become three sizes or three colors, which opens conversations about scale and composition.
- Use personal symbols. Initials, pets, logos, and favorite characters give students ownership and motivation.
- Plan for a gallery. Display drawings beside the prints, so viewers see the translation from flat to solid.
For classes that want a clear path, our bas relief guide shows several ways to raise a flat image into a printable surface.
8. Building creativity and critical thinking through making
Research on 3D printing as an educational technology links it to creativity and collaboration, and recommends grounding use in learning theories such as experiential learning and critical making. A pedagogical study argues for constructionism, where the printer is a catalyst for problem-solving rather than the point of the lesson. The process matters more than the object.
Here is how to build that into class:
- Design briefs with constraints. "Make a hook that holds a backpack and fits in a hand" forces trade-offs.
- Planned failure. Treat the first print as a draft. Students diagnose what went wrong and revise.
- Peer critique. Pairs test each other's prints against the brief and suggest one change.
- Prediction and reflection. Before printing, students sketch how they expect the object to look and perform. Afterward they compare.
- Collaboration roles. Designer, tester, and documenter rotate so every student practices each skill.
Another education study points to critical thinking, design thinking, and collaboration as the 21st-century skills students gain from the digital-to-physical workflow. Structure your lessons so these skills show up in the work, not just in the unit title.
9. Assessing learning and project outcomes
Grading the print alone rewards printer luck. Grade the thinking instead, and use a short rubric students see before they start.
Consider criteria such as:
- Concept and artistic intent: does the design reflect a clear idea and the student's own artwork?
- Process and iteration: did the student sketch, test, and revise?
- Technical craft: is the model printable, and is the finish careful?
- Reflection: can the student explain choices and name one thing they would change?
Useful evidence includes process journals, screenshots of Tinkercad versions, a photo of an early print, and an oral critique. The M.A.K.E. 3D curricular modules offer structured lessons (Designing Form, Modeling Form, Capturing Form, Process, Materials) mapped to learning objectives, which helps you align assessments with your standards. Use checkpoints before printing, as the middle school figure project does, so you catch problems before the queue fills.
When a print fails for mechanical reasons, assess the design and reflection anyway. Students should never lose credit for a clogged nozzle.
10. A teacher's note on where to begin
I have seen 3D printing pay off most when students stop treating it like magic and start treating it like a sketchbook that happens to be solid. Design thinking, problem-solving, and collaboration all show up the first time a student reprints a hook that snapped. Pick one simple project, run it with a small group, and adjust. Our blog's school printing guide goes deeper on lesson planning.
— Ian
11. When you need finished keepsakes without printing in class
Some classrooms lack ventilation, printer access, or spare hours. For those, we turn student drawings, photos, and logos into finished 3D prints. You upload the artwork, we generate an AI preview for your approval, you pick size and color, and we print it in PLA and deliver it. That works well for end-of-year gifts, families who want a keepsake of a child's art, or a school that wants the result without the machine. You can also preview a child's drawing as a 3D toy before ordering.

Ready to try it with one drawing? Start your order at 3D Print Pics and see the preview before anything prints.
FAQ
What are some creative 3D print ideas for teachers?
Good starters include name tags, marble mazes, relief prints from student drawings, and mini figures. These need little CAD skill and work in single-color PLA. The MIT K-12 Maker Lab lists many more.
What should art teachers check before printing in class?
Check ventilation first. Choose an enclosed printer, use PLA, and exhaust to the outdoors or use filtration, as Washington State health guidance advises. Then plan training and signage.
Is there anything illegal to 3D print?
Yes, laws vary by place, so check local rules. The American Library Association recommends written policies that prohibit illegal or infringing prints while still supporting creative experimentation. A short school policy keeps expectations clear.
How do I turn a student drawing into a printable model?
Convert the drawing to SVG, import it into Tinkercad as a relief, export an STL, and slice it. MIT's step sequence covers each stage and needs no deep CAD skills.