This guide gives you ten beginner-friendly homeschool 3D printing projects, each paired with a downloadable model source, learning goals, and a realistic time estimate. You will also find setup basics, safety guidance backed by federal research, and a simple way to turn any project into a graded lesson. Pick one project below and you can start printing this week.
TL;DR:
- Most beginner projects can be completed in under an hour with simple design tasks and a few printing sessions, suitable for a range of ages.
- Using PLA filament and proper ventilation significantly reduces health risks associated with 3D printing at home, especially around children.
- Starting with small, low-difficulty projects like name keychains or pencil toppers builds confidence and foundational skills before tackling complex challenges.
- Always check model licenses and work with organizations like libraries or makerspaces that offer access and guidance to ensure safe, legal printing.
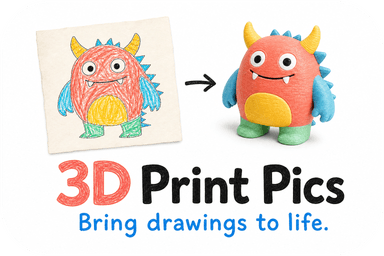
- Converting finished drawings into lasting keepsakes involves AI preview tools and non-toxic PLA, providing a safe way to preserve children's artwork.
Table of Contents
- 1. Ten Beginner Homeschool 3D Printing Projects
- 2. What You Need to Get Started at Home
- 3. Keeping 3D Printing Safe for Kids at Home
- 4. Turning Any Project Into a Full Lesson Plan
- 5. Where to Find Printable Models and Lesson Bundles
- 6. Turning Student Drawings Into Lasting Keepsakes
- What Actually Works in a Homeschool 3D Printing Unit
- Turning Classroom Projects Into Keepsakes Worth Keeping
- FAQ
- Sources
1. Ten Beginner Homeschool 3D Printing Projects
Each project card below names the age range, subject tie-in, learning goals, pacing, and where to find a model. PLA is the recommended material for every project unless noted; resin is not recommended for projects involving young children because of handling and curing hazards covered in the safety section.
1. Personalized name keychain (CAD/design practice). Ages 8 to 14, math and intro design. Students type their name into Tinkercad, adjust letter height and thickness, then export and print. Learning goals: basic CAD navigation, measurement units, and spatial reasoning. Pacing: one session of under an hour, with print time running separately over a few hours. A bundle of beginner Tinkercad projects built around this exact keychain activity notes that lessons like this typically run under an hour from sketch to printed model. Slicer tip: 0.2 mm layer height, 10% infill. Low difficulty, light supervision.
2. Pencil topper or desk mascot (CAD/design practice). Ages 7 to 12, art and design. Kids sculpt a simple animal or shape in Tinkercad using basic shapes. Learning goals: shape combination, scale, and iteration. Pacing: two 30 minute sessions over two days. Same teacher bundle referenced above includes a topper variant. Slicer tip: supports usually unnecessary if the design avoids steep overhangs. Low difficulty.
3. Spacecraft truss structure (structural testing). Ages 11 to 16, physics and engineering. Students build a lightweight truss modeled on real spacecraft design, then test it under load. Learning goals: load distribution, triangulation, and engineering trade-offs. Pacing: a week-long challenge, roughly five 45 minute sessions. NASA provides a spacecraft structures engineering lesson with the full challenge outline and data sheets. Moderate difficulty, adult supervision recommended during testing.
4. Material strength test specimens (structural testing). Ages 12 to 17, materials science. Students print identical bars at different infill percentages or layer heights, then snap or bend them to compare strength. Learning goals: variable control, data recording, and graphing results. Pacing: two to three sessions across three days, since prints need to finish between sessions. A mechanical properties lesson series from university K to 12 outreach work walks through tensile and flexure testing with printed specimens. Slicer tip: keep print orientation consistent except for the one variable being tested. Moderate difficulty.
5. STEMonstration mini-build (cross-curricular art and science). Ages 10 to 15, space science. A short, focused activity modeled on real spacecraft hardware problems. Learning goals: connecting design choices to real engineering constraints. Pacing: a single 45 to 90 minute session. NASA's own STEMonstration 3D printing activity is built for exactly this kind of quick, hands-on session. Low to moderate difficulty.
6. Family photo keepsake ornament (cross-curricular art and science). Ages 5 to 12, art and family history. Kids choose a drawing or photo to turn into a small 3D object. Learning goals: translating a 2D image into a 3D form and discussing proportion. Pacing: one session to choose and submit the image, printing happens separately. Low difficulty, best for younger kids with adult help choosing colors and size.

7. Mini vending machine or lemonade stand prototype (entrepreneurship for kids). Ages 10 to 16, business and design. Students design a simple product housing or display stand, then pitch it. Learning goals: design for function, basic cost thinking, and presentation skills. Pacing: week-long, four to five sessions. Moderate difficulty.
8. Lunar habitat module (structural testing, cross-curricular). Ages 11 to 17, space science and architecture. A scaled-down habitat shape tested for stability on an uneven surface. Learning goals: structural stability and environmental constraints. Pacing: week-long challenge. Moderate to high difficulty, adult supervision during testing.
9. Custom cookie cutter or stencil (CAD/design practice). Ages 6 to 11, math and art. Students trace or design a simple shape and convert it to a printable outline. Learning goals: outline tracing, symmetry, and basic food-safe design thinking. Pacing: one 30 to 45 minute session. Low difficulty.
10. 4-H maker demonstration piece (entrepreneurship, community). Ages 9 to 16, communication and community service. Students design and print a small item to demonstrate or donate at a community event. Learning goals: public presentation and community contribution. Pacing: one to two weeks depending on event timing. The 4-H 3-D printing and design project guide outlines this kind of demonstration-focused activity in detail. Low to moderate difficulty.
2. What You Need to Get Started at Home
You do not need an expensive machine or a design background to begin. A beginner printer just needs a stable frame, a build plate of at least 150 by 150 millimeters, and a reliable filament feed path that does not jam easily.
For software, Tinkercad is free, browser-based, and simple enough for a first grader to use with guidance. For models, Printables and Thingiverse host large libraries of printable files, though you should always check the license before modifying or reselling anything you download.
PLA is the right first filament for almost every homeschool project. It prints at lower temperatures than other common plastics, needs no heated enclosure, and produces far fewer fumes than alternatives.
If you do not own a printer yet:
- Check your local public library, many now offer printer access and basic training.
- Ask a nearby community college or makerspace if they allow walk-in or scheduled print time.
- Look into online print services that accept uploaded files and ship finished parts.
Pro Tip: Bring a printed project plan when you approach a library or makerspace. Staff are far more likely to say yes when they can see exactly what you want to print and why.
3. Keeping 3D Printing Safe for Kids at Home
Desktop 3D printers release ultrafine particles and volatile organic compounds while running, and these emissions are the main reason ventilation matters more than most homeschoolers expect.
Placing a printer in a well-vented room or inside a ventilated enclosure with exhaust routed outdoors substantially cuts particle and VOC exposure, according to federal guidance on safe 3D printing in schools, libraries, and makerspaces. This single control step does more for air quality than any filament choice alone.
Practical steps to take at home:
- Run the printer in a room with a window, box fan, or dedicated exhaust, never in a child's bedroom overnight.
- Choose PLA over resin whenever children are involved. Resin printing requires gloves, eye protection, and careful handling of uncured liquid resin, and its safety data sheet should be read before any resin is brought into a home with kids.
- Keep a separate area for post-processing (sanding, gluing) away from where prints are designed or stored, and wash hands after handling filament or finished parts.
- Avoid touching the hot end or heated bed during or shortly after a print, both can cause burns well above room temperature.
- Change out of clothing worn during heavy sanding before sitting on furniture, to avoid tracking dust through the house.
4. Turning Any Project Into a Full Lesson Plan
Every project above fits one of three pacing templates, depending on how much depth you want.
- Single-session quick project (30 to 60 minutes): design or customize a model, submit it to print, discuss the design choices while it prints.
- Two to three session skill-build (spread over 2 to 3 days): session one is design, session two is review and revise after seeing a test print, session three is final print and reflection.
- Week-long engineering challenge (4 to 5 sessions): research and sketch, build a first prototype, test and record data, redesign based on results, and present findings.
For assessment, ask for a concrete artifact rather than a vague summary:
- A design sketch showing dimensions and intended function.
- A test-data table for any engineering project, recording variables like infill percentage against strength or load outcome.
- A short reflection, written or recorded on video, explaining what changed between the first and final version.
A simple rubric works across ages if you score four things: evidence of design thinking, evidence of iteration (did the student actually revise something?), functionality (did it do what it was supposed to do?), and communication (can the student explain their choices?). For younger kids, drop the data table requirement and focus on the sketch and reflection instead.
5. Where to Find Printable Models and Lesson Bundles
Tinkercad hosts free, editable lesson-style projects that are ideal for beginners because you can open and modify someone else's design rather than starting from a blank screen. Printables and Thingiverse both carry large homeschool-friendly libraries, though licenses vary. Always check whether a model allows modification or classroom use before you build a lesson around it. Paid options like the beginner Tinkercad bundle used in the project list above often include pacing guides and printable worksheets alongside the model files.
If you need printer access, approach a library or makerspace the same way a 4-H group would: bring a one-page project plan showing what you want to print, how long it takes, and what supervision you will provide. The 4-H extension guide to 3D printing and design outlines this kind of community-facing approach in more detail.
Before printing any downloaded file, check for:
- Wall thickness of at least 1 to 2 millimeters so thin parts do not snap.
- Unsupported overhangs that will need added supports, which means more print time and cleanup.
- A license that permits your intended use, especially for anything shared publicly afterward.
6. Turning Student Drawings Into Lasting Keepsakes
Beyond practice prints, some homeschool projects deserve a polished, lasting version: an end-of-unit keepsake, a display model for a portfolio, or a physical copy of a child's own artwork. Non-toxic PLA materials make this kind of object safe to keep on a shelf or hand to a grandparent without the handling concerns that come with resin.
A photo-to-model service works by taking an uploaded drawing, photo, or logo, generating an AI preview of the 3D version, and letting you approve colors and size before anything prints. That workflow fits naturally at the end of a unit, when the goal shifts from learning CAD to producing something worth keeping.
If you upload a child's artwork anywhere online, get permission from the child and, when relevant, their other parent or guardian, and avoid including identifying details like a full name or school in any publicly shared file.
What Actually Works in a Homeschool 3D Printing Unit
The projects that stick are the ones where kids see their design fail first. A truss that collapses under a small weight teaches more about triangulation than a perfect first print ever could, because the fix is obvious and the kid wants to try again immediately.

The most common mistake is starting with something too ambitious, a multi-part engineering challenge before anyone in the house has used a slicer. Start with a single-session project like a keychain or pencil topper, let the first print come out slightly wrong, and build confidence from there.
Keep a simple photo log of each version a student makes. Small wins, a slightly stronger truss, a cleaner print, a bolder design choice, are worth pointing out on their own.
— Ian
Turning Classroom Projects Into Keepsakes Worth Keeping
Once a project is finished, you can turn the drawing, photo, or design itself into something that lasts longer than a worksheet. An AI preview can be generated from your uploaded image, you approve the colors and size, and the item is printed in non-toxic PLA before shipping.

This fits best as a capstone piece, not a replacement for learning CAD. Use the projects above to teach design and iteration, then use our service when a piece is ready to become a permanent keepsake.
- AI-generated preview before you commit to an order.
- Non-toxic PLA with options for different sizes and colors.
- Simple online approval, no design software required on your end.
Ready to turn a finished drawing into a 3D keepsake? Order a custom 3D model and see a preview before you pay.
FAQ
What are some ideas for 3D printed school projects?
Strong beginner options include personalized keychains, pencil toppers, material strength test specimens, and small engineering challenges like a spacecraft truss structure. Each pairs a short design task with a clear learning goal, from basic CAD skills to structural testing, as outlined in the project list above.
What is the most profitable item to 3D print?
This article focuses on educational projects rather than commercial production, so we cannot point to a verified profitability figure. A better homeschool framing is entrepreneurship practice: have students design, price, and pitch a small product like the vending stand prototype described above.
Is there anything illegal to 3D print?
Yes, certain items like functional firearm components and copyrighted designs sold without permission can be illegal depending on where you live, so homeschoolers should stick to original designs or properly licensed models. Checking a model's license before printing or sharing it, as covered in the "where to find models" section, avoids most of this risk.
What are some useful 3D printing projects for my home?
Useful at-home projects include replacement parts like cookie cutters or stencils, organizational items, and personalized keepsakes made from a child's own drawing or photo. For keepsakes specifically, a non-toxic PLA print is a safer long-term choice than resin for anything handled by kids.
Sources
- Tinkercad 3D Printing Projects Bundle | 6 Beginner STEM Activities | Grades 5-9
- Approaches to Safe 3D Printing: A Guide for Makerspace Users, Schools, Libraries and Small Businesses
- Spacecraft structures: a lesson in engineering (NASA)
- Mechanical properties of 3D printed parts in fused deposition modeling (AGPA lesson plans)