For most professionals, a minimalist acrylic nameplate or a custom 3D-printed relief design gives you the best mix of polish and personality. DIY suits simple builds like vinyl on acrylic or a laser-cut wood block. If you want a logo, a pet portrait, or a tactile keepsake finish, ordering a custom 3D print saves time and gets you a result harder to match by hand. Here is a shortlist to start from.
TL;DR:
- Custom 3D-printed nameplates are ideal for complex designs like logos, pet likenesses, or children’s drawings, especially when tactile detail is needed.
- Buying specialized materials such as engraved metal, acrylic, or non-toxic PLA will prevent wasted cost and ensure a professional finish in DIY projects.
- Legibility depends on choosing wide, open font styles with sufficient spacing and sizing the letters to fill about a third of the nameplate height.
- DIY projects like vinyl on acrylic take less than an hour, while resin castings or 3D printing generally require a weekend or longer for completion.
- Order from professional services when detailed images, multiple colors, or complex shapes are required for higher quality and less effort.
Table of Contents
- Ten Desk Nameplate Ideas Worth Trying
- What to Buy and How to Build Each Style
- Choosing Fonts That Stay Readable From Across the Room
- Two Builds You Can Finish This Week
- Matching the Nameplate to Your Office Culture
- Popular Themes People Choose for Their Nameplates
- Keeping a Nameplate Looking Good Over Time
- Ordering a Professional Nameplate and What It Costs
- When a Custom 3D Print Beats a DIY Build
- An Easier Path When DIY Isn't the Goal
- Where the Design Advice Came From
- Sources
- FAQ
Ten Desk Nameplate Ideas Worth Trying
The right style depends on your desk setup, your office culture, and how much time you want to spend building something.
- Acrylic with cut vinyl lettering: best for clean, corporate desks; low complexity, about an hour.
- Edge-lit LED acrylic: best for creative studios or gaming setups; moderate complexity, an afternoon project.
- Engraved wood block: best for warm, casual offices; moderate complexity, needs a laser or router.
- Brushed metal bar nameplate: best for law firms or executive desks; low DIY feasibility, usually ordered.
- Resin cast with embedded objects: best for hobbyists who want personality (dried flowers, small charms); high complexity, a full weekend.
- Photo or logo turned into a 3D relief plate: best for pet lovers, parents, or brand-conscious founders; low effort if ordered, since the model is generated for you.
- Minimalist brushed brass nameplate: best for boutique or design-forward offices; typically ordered rather than made at home.
- Repurposed vintage plaque: best for anyone who likes character over polish; low cost, moderate time hunting for the right piece.
- Chalkboard or dry-erase nameplate: best for shared desks or hot-desking teams; very low complexity, ready in minutes.
- Stacked 3D-printed letters in PLA: best for playful or tech-forward workspaces; moderate complexity if printed at home, low effort if ordered.
Matte finishes tend to suit formal desks, while glossy acrylic or metallic accents read better in creative or client-facing spaces.
What to Buy and How to Build Each Style
Each approach uses different materials, and knowing what to buy first saves a wasted trip or a ruined batch of resin.
- Acrylic and vinyl: buy clear or frosted acrylic sheets and adhesive vinyl at a craft or sign supply store; a vinyl cutter or Cricut handles the lettering.
- Wood blanks: pre-cut wood rectangles are available at craft stores; a laser cutter (often rentable at a local makerspace) engraves cleanly.
- Resin kits: two-part epoxy resin, silicone molds, and pigment are sold as beginner kits; buy from a hobby supplier rather than a hardware store for cleaner curing.
- PLA filament: widely available in dozens of colors; choose a non-toxic PLA blend for anything that will sit on a shared desk.
- Metal or brass plates: these are almost always outsourced to an engraver rather than made at home.
If you do not own a laser cutter or 3D printer, many public libraries and makerspaces rent time on both by the hour.
Resin needs a well-ventilated space and gloves, since fumes and skin contact are common irritants during curing. Sand any 3D-printed piece with fine-grit paper before sealing it with a matte or satin spray for a smoother, less plasticky finish.
Pro Tip: Test your font and layout on paper before cutting vinyl. A dry run catches spacing mistakes that are easy to miss on screen.
Choosing Fonts That Stay Readable From Across the Room
A nameplate only works if people can read it without squinting, and that comes down to letterform choice more than decoration. Wide letters with open inner counters and a generous x-height hold up better at a distance, according to research on fonts designed for distance reading. That same guidance points to wider letter spacing and moderate stroke weight as reliable ways to improve legibility on short words like names.
A humanist sans or an open geometric sans (rather than a tight condensed display face) reads clearly at desk height and matches most office styles. Condensed fonts often trigger what type designers call a crowding effect, where letters blur into each other and become harder to tell apart, a problem this same font legibility research flags directly.
For sizing, keep the lettering height around a third of the plate's total height, with enough side margin that the name does not touch the edges. Dark text on a light plate is the safest default; light text on dark backgrounds needs slightly wider spacing to read as cleanly. Matte finishes cut glare and help thin strokes stay visible, while gloss can make those same strokes disappear under office lighting.
Two Builds You Can Finish This Week
Both projects use tools available at most craft stores or local makerspaces.
Build A: Vinyl on acrylic (beginner, about 45 minutes) Supplies: clear acrylic blank, adhesive vinyl, a vinyl cutter, transfer tape, a squeegee or credit card.
- Measure your acrylic blank and set up your design software to match.
- Choose a wide, open sans serif and size the text to fill about a third of the plate height.
- Cut the vinyl on your cutter and weed out the excess.
- Apply transfer tape over the design and lift it as one piece.
- Press the vinyl onto the acrylic, working out air bubbles with the squeegee.
- Peel the transfer tape slowly, checking that all letters stayed put.
Build B: Resin embed or 3D-printed nameplate (intermediate, a weekend for resin, a few hours for printing) Supplies: two-part resin and mold, or a 3D printer with non-toxic PLA filament, plus sandpaper and clear sealant.
- Design or source a nameplate model, or mix resin per the kit instructions.
- For resin, pour a thin base layer first and let it partially set to trap fewer bubbles.
- Add embedded items (charms, dried flowers) in the second pour.
- For printing, slice the model with moderate wall thickness for strength.
- Sand the cured resin or printed piece with fine-grit paper.
- Seal with a matte or satin spray for a professional finish.
Pro Tip: Wave a small torch or heat gun briefly over fresh resin to pop surface bubbles before they cure.
Matching the Nameplate to Your Office Culture
A nameplate that fits a law firm will look out of place at a design studio, and the reverse is just as true. Formal offices tend to favor brushed metal, engraved brass, or matte acrylic in neutral tones, with a plain sans serif and no extra ornament. Casual or hybrid workplaces have more room for wood, chalkboard, or playful color blocking, since the goal is warmth rather than authority.
Creative studios and startups often lean into bold color, exposed materials like raw acrylic edges, or a 3D-printed piece that reflects a logo or mascot. Shared or hot-desking environments do better with something temporary, like a dry-erase plate or a lightweight printed tag, since the desk changes hands often.
Company culture matters as much as job title. A conservative client-facing role usually calls for understatement, while an internal-only creative team has more freedom to experiment. When in doubt, look at what is already on nearby desks: a nameplate that clashes with the room draws the wrong kind of attention.
Popular Themes People Choose for Their Nameplates
Most personalized nameplates fall into a few recognizable categories, and picking one gives you a starting point instead of a blank page.
Hobby-driven designs are common: a runner might use a shoe silhouette, a gardener a small leaf motif, a musician a tucked-in instrument icon. Profession-based themes lean into the job itself, like a stethoscope accent for a clinician or a gavel detail for legal staff. Pet owners frequently turn a photo of a dog or cat into a small 3D relief that sits beside or replaces the name entirely.

Humor shows up often in casual offices: a play on the person's name, a pun tied to their role, or a small joke only their team will get. Family and memory-driven designs, such as a child's drawing turned into a solid keepsake, tend to appear on desks where the workspace doubles as a personal space. Whatever the theme, keeping the core name legible matters more than the decoration around it.
Keeping a Nameplate Looking Good Over Time
A nameplate that looks sharp on day one can dull fast without basic care. Acrylic and glass scratch easily, so wipe them with a microfiber cloth and a mild, ammonia-free cleaner rather than paper towels or glass spray. Wood pieces benefit from an occasional light coat of furniture wax, especially if they sit near a sunny window where fading is a risk.
Resin can yellow slightly with prolonged UV exposure, so keeping it out of direct sunlight extends its color. Printed PLA pieces hold up well indoors but soften near heat sources like desk lamps or sunny windowsills, so keep them a few inches away. Dust buildup in engraved letters is common on textured surfaces: a soft brush or a toothpick wrapped in cloth clears grooves without scratching the finish.

A quick wipe-down every couple of weeks keeps most materials looking new for years rather than months.
Ordering a Professional Nameplate and What It Costs
When a project is more than you want to build, or the design is too detailed for a home cutter, ordering from a specialist is the faster route. Engraved metal or brass plates from a local trophy or sign shop typically run in the range other buyers report seeing at custom engravers, though prices vary by material and size. Custom acrylic shops offer similar turnaround, usually within a week or two depending on order volume.
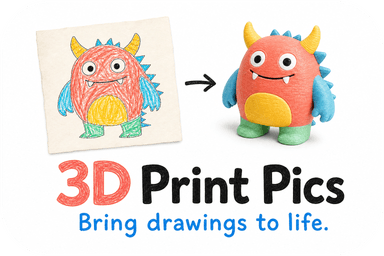
For a photo, logo, or drawing turned into a physical object rather than flat text, a photo-to-3D print service is the more direct path. 3D Print Pics offers custom 3D models priced in the range of about fifty to eighty dollars one-off, with rush processing available for ten dollars one-off, according to the company's site. That covers a model generated from an uploaded image, a size and color choice, and a non-toxic PLA build, which suits a tactile keepsake nameplate better than flat engraving does.
When a Custom 3D Print Beats a DIY Build
A custom 3D print earns its cost when the design is complex, like a detailed logo, a pet's likeness, or a child's drawing rendered as a solid object rather than flat text. It also makes sense when you want a tactile keepsake instead of a printed sign, since a relief or figure holds detail a vinyl cutter cannot reproduce. Multi-color PLA options add a level of finish that is hard to match with home equipment.
Non-toxic PLA and a preview approval step before printing reduce the guesswork that usually comes with ordering something sight unseen. For readers weighing DIY against ordering, that combination of safety and a look-before-you-buy step is worth factoring into the decision.
— Ian
An Easier Path When DIY Isn't the Goal
If building a nameplate from scratch isn't how you want to spend a weekend, 3D Print Pics turns an uploaded photo, drawing, or logo into a 3D model preview before anything gets printed. You pick the size and one of up to seven color options in non-toxic PLA, approve the preview, and the piece ships to your door.

DIY builds like vinyl on acrylic can be finished same-day, while a custom 3D print typically takes longer since it is modeled, previewed, and printed to order; rush processing is available for an additional fee if you need it sooner. For a detailed logo, a pet photo, or a child's drawing you want preserved as an object rather than a flat sign, check current pricing and order a custom 3D model.
Where the Design Advice Came From
Legibility guidance in this piece draws on research on fonts for distance reading and on signage typeface design analysis. Ordering details come from 3D Print Pics.
Sources
- Designing legible fonts for distance reading (chapter excerpt)
- The design of a signage typeface — I Love Typography
FAQ
What are some creative ideas for name plates?
Popular options include minimalist acrylic with cut vinyl, engraved wood blocks, edge-lit LED acrylic, and resin casts with embedded objects like dried flowers. A photo, pet portrait, or logo turned into a 3D relief plate is another strong option for a more personal, tactile result.
How do I make a DIY name plate for my desk?
The simplest approach is vinyl lettering applied to an acrylic blank using a home cutter like a Cricut, which takes under an hour. For something more detailed, a resin cast or a 3D-printed design takes longer but allows for embedded objects, textures, or custom shapes.
How to personalize a desk at work?
Beyond the nameplate itself, personalization often comes through color choice, a hobby or profession-related motif, or a small joke tied to your role or name. Keeping the core text legible matters more than the amount of decoration you add around it.
What is the best font for a desk name plate?
A humanist or open geometric sans serif with a generous x-height and open counters reads most clearly at desk distance, based on research into fonts built for distance legibility. Tightly condensed display fonts tend to blur together on short words like names and are best avoided.